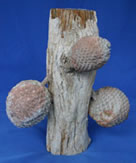
Araucaria branch with cones mold.
An Araucaria branch, with three cones attached, is definitely a specimen worth casting. This cast is weighted and cast in solid resin. The challenges with this piece were to have a space between the stems and branch and have proper placement of the sprues so that there would not be a place for air to get trapped when the cast was poured.
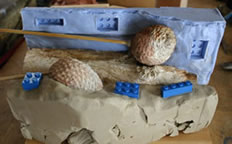
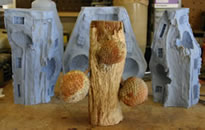
We started with a clay base. The clay must extend to a mid-point on the specimen. This will help ease the stress on the original and cast during the demolding process. The third photo shows the mid-wall, alignment blocks (Legos), and sprues in place. As the casting resin is poured into the mold, the sprue holes will allow otherwise trapped air to escape.
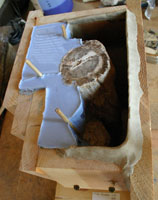
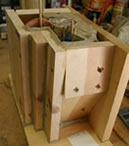
Photo #4 shows the specimen ready to have the first piece of the mold poured. If you have seen some of our other mold discussions you may have noticed that the frames for those are built a little more sturdy. That is because the frame will be placed in the pressure bed and subjected to 80 PSI. This particular mold will not need the frame when casting is done and only needs to be strong and well made enough to keep the silicone from leeking out. Therefore, once the mold is made the frame is no longer needed and can be recycled.
The fifth photo shows the first of the two top side pieces made. The second piece of the mold has been finished in photo six. Photo seven shows the specimen ready to pour the final piece of the mold. The next photo shows the mold completely poured and cured. Each pour of the mold must cure for one to two days. The thicker that portions of the mold are, the longer it must cure. If the weather (or temperature where you are making the mold) is cooler, then you should allow for a longer curing time. If you remove the mold before it has cured, it will not have set up and will not be firm. Then you will have to throw it away and start over. Been there, done that.
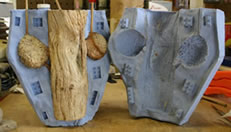
The next two photos show the original Araucaria branch and cones specimen being removed from the mold. First the base, or larger portion was removed. Then the two smaller, top half pieces. Photo eleven shows the three mold pieces with the inside of the mold exposed, to show detail.
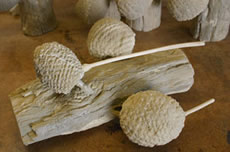
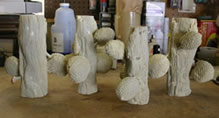
Photo #12 shows the first four casts from each of the four sides of the specimen. The cast specimen with two of the three sprues still attached is the next photo.
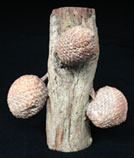
The last photo is of a painted replica specimen. The replica is painted a little different from the original specimen, because we wanted to bring out more of the detail that the specimen has to offer. The painted replica wil give you everything the original specimen has to offer and more, with regard to detail.
To see some of the other steps in our replica creation process, please view other pages in this web site. Also enjoy the other products and information on this web site. New additions, and updates, are made to the site monthly.
Thank you for visiting.
Original specimen.

Original specimen with, clay base, mid-wall, sprues & blocks.
First piece of mold cast with mid-wall removed.
Ready to pour third part of mold .
Bottom part of mold removed.
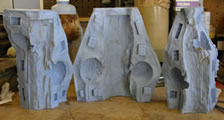
Three piece Araucaria branch mold.
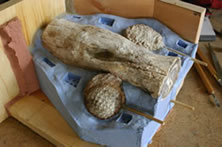
Araucaria cast with sprues still attached.

Original specimen & clay base.
Specimen ready to cast first of three parts.
Second piece cast & clay base removed.

Frame removed from mold.
Specimen removed from 3 piece mold.
Four casts showing all angles of specimen.
Finished Araucaria branch replica.